
why not try it in Adobe Photoshop first? to see if a tattoo looks good on you before having one, here's what you can do:
1. open any picture with an exposed body part in photoshop and a tattoo design


2. it's easier to select the dragon by selecting the white area around it first(magic wand tool) then right click and select inverse.

4. with the move tool, drag the dragon to (your) picture. to transform it, press and hod Ctrl then T. with the dragon still selected, right click and warp. adjust the nodes so that the dragon falls nicely on the skin.


5. on the layers window, change the mode to soft light or multiply (this part depends on what looks better to you). adjust opacity and blur a little.


6. you might want to delete some parts of the tattoo just like what i did with this image to give it a more realistic look.


(if you have suggestions or better ideas, feel free to drop me some comments. thanks:)
this effect works better on blonde hair.
1. open any picture in Photoshop

2. select a soft brush (try 24px) and press Q to enter qick mask mode.

3. outline hair with brush, then cover the entire hair area. don't worry if you paint in the wrong places because you can always edit it using the eraser tool:).


here is how the angel effect is done:
1. open any picture you'd like to put the effect on

2. duplicate the picture by going to layer > duplicate, and then change the blending mode to soft light (just right click the duplicate layer). apply gaussian blur to the duplicate layer by clicking on filter > blur > gaussian blur, then set the radius to 30 (radius may vary depending on the photo).


4. create a gradient map layer by going to layer > new adjustment layer > gradient map, then set the mode to lighten.


5. with all the effects that have been applied above, i'm pretty sure the picture looks washed out. let's put the necessary colors back by using the brush tool. make sure that the foreground color is set to black, and then select a soft, round brush to touch up parts of the picture that you want to saturate a bit. (make sure brush opacity is set to 20-30%). i used the brush to touch up the hair, eyebrows, eyes, and lips)
6. to prevent the picture from looking too faded out, select layer > new adjusment layer > levels from the menu. do the necessary adjustments: the amount of black, gray, and white.

7. flatten the image by clicking on the little triangle on the upper right corner of the layers window. save baby.
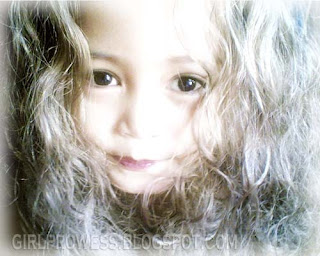 (if you have better ideas please feel free to drop me some comments... thanks:)
As a young kid, I’ve always been puzzled on how photo editors create special effects on pictures just like making clothes appear invisible. I thought of googling it and try to learn it somewhere in cyberspace. But even before I turned my pc on, I had an idea on how to do it…
I took two pictures.. the second one with the kid on it:


After the jacket has been selected, I right clicked inside the selection and set the feathering to 1.


then I clicked on the filter tab>artistic>plastic wrap to give the jacket luster and a watery look.

clicked on the eraser tool and adjusted the brush size so that it covered the whole jacket.


Now you can also have the invisibility shirt effect on your pictures. Hope this helps. :)
(p.s. feel free to comment if you have better ideas or if you want to add anything. tnx.)


